Interactive Links in Google Slides
How to Fully Utilize GS for Your Architecture and Interior Design Clients
Sharing with Google Slides is a powerful tool for creating visually appealing presentations, and adding links to images can enhance interactivity. This feature is particularly beneficial for architects and designers, allowing them to seamlessly integrate project visuals, mood boards, and design inspirations into their presentations. By linking images to external references such as project websites, detailed design documents, or 3D models, architects and designers can provide clients with a comprehensive and immersive experience. This tutorial will guide you through the process of effortlessly embedding these links, enabling architects and designers to showcase their work while offering convenient access to additional project details and resources. This not only streamlines communication but also empowers clients to explore the finer details of architectural and design projects with just a click.
Step 1: Create a New Google Slide Presentation
Open your Google Drive (drive.google.com). Click on the “+New” button on the left side and select “Google Slides.” Choose a blank presentation or use a template that suits your needs.
Step 2: Add Images to Your Slides
Click on the slide where you want to add the image. Click on the “insert” menu at the top. Choose “Image” and select the source of your image (upload from computer, Google Drive, URL, etc.). Once the image is inserted, you can resize and reposition it as needed.
Step 3: Add a Link to the Image
Select the image you want to link. Click on the “Insert Link” icon. In the dialog box, enter the URL you want to link to. Click “Apply.” Now, your image is a clickable link that will open the specified URL when clicked during the presentation.
Step 4: Test the Links
Before sharing the presentation, it’s a good practice to test the links to ensure they are working correctly. Enter the presentation mode by clicking on the “Present” button in the top right corner and check that the links function as expected.
Step 5: Share the Presentation with Your Client
Click on the “Share” button in the top right corner. Enter your client’s email address in the “Invite people” field. Choose the appropriate sharing settings (view, comment, or edit) based on your client’s needs. Click “Send.” Your client will receive an email with a link to the presentation, and they will be able to view or interact with it according to the permissions you set.
Additional Tips:
By following these steps, you can create an engaging and interactive presentation with clickable links in Google Slides and easily share it with your clients.
XOXO,

What is Designer's Corner?

In this blog, tutorials, business advice, and shared experiences merge to guide the path for aspiring interior designers. The author, a seasoned interior designer with over two decades of experience in transforming spaces has encountered a myriad of clients, each with their unique quirks and peculiar requests. Here, the tutorials offer invaluable insights into the craft, while business advice extends a guiding hand to novices. Yet, it's the Designer's Corner where the past informs the present, and the future of design is shaped with every shared story. Embracing the industry's lighter facets, anecdotes are shared, and the occasional absurdity is met with laughter, fostering a community where designers find solace and wisdom in the collective journey. Whether you're a designer seeking affirmation, a client looking to hire, or navigating your own renovation project, this space can be a guide.
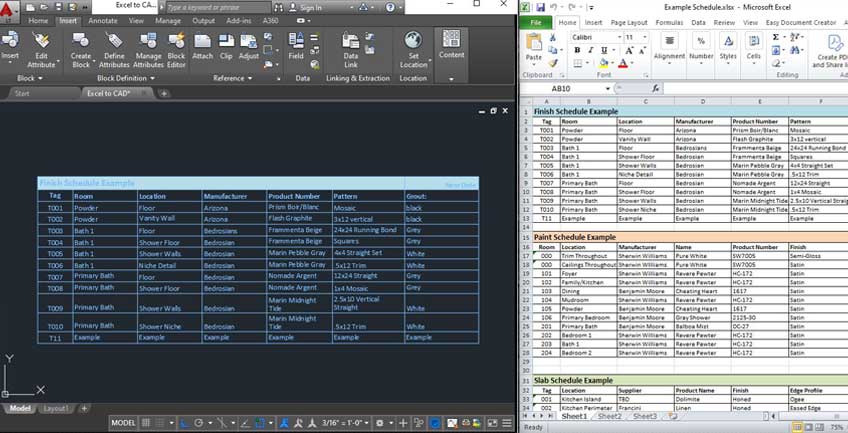 Excel Spreadsheet Into AutoCAD